Pages

October 29, 2014

Club Scrap Blog Hop - Homestead

 photo 1014_bloghopbadge_zpsb3b409af.jpg

Why hello!  Welcome to the Homestead blog hop! This month we're using Club Scrap's Homestead collection.  I'm going to show you how I used the monthly Assembly Line Scrapbooking instructions to make a quick and fun page!

If you traveled here from Lisa's blog, then you are following the hop!  If you've lost your way or just want to see all the links in one place, head over to the Club Scrap blog to see a list of all the talented bloggers participating today.

Life is getting ever so busy, and it's just going to get busier as we get closer to the holiday season, so I decided I needed to do something quick and easy this month.  I turned to Club Scrap's trusty Assembly Line instructions to make a page.  I made 4 2-page layouts, in fact, following the instructions included as part of my Lite kit, but have only completely finished one 2-page layout with photos, embellishments, and journalling.


What I like most about ALSB is that the "theme" of the kit doesn't necessarily need to match up with your photos.  I tend to base my photos choices on the colors and mood of the pages I've pre-made using the ALSB instructions.  While this kit would be great to use to document a day out in the country, I used the prominent oranges to bring out the colors in my sunset photos from an evening at the harbor in Auckland, New Zealand.  Country life, meet city life!


I love all of the details the instructions encourage you to add, such as the stenciling along the top of the left page and the stencils around the journaling box.  You don't have to be clever since Club Scrap does that for you already!  The pre-printed wording on these pages even ended up working for my photos, as we joked that this giant and expensive yacht was my friend's new and humble home...


I didn't end up buying the stamps this month (even though they are oh so cute!  On my wish list!) but I did the second best thing and printed out the images that are sent as a link to members each month and used my stencil to enhance those as well.  Another added bonus of being a member - free printables are included each month!


So just a simple page for me this month, but sometimes that's all you need - to get your pictures in a scrapbook and journal about your adventures before you forget about them!

Thank you all for stopping by and I hope you have a chance to get out your ALSB pages and get some scrapping done before things get too crazy for you too!

Now head on over to Annette Dragon's to see what she has to show you this month.  Come back next month when we're relaxing with the Lakes collection!


August 27, 2014

Club Scrap Blog Hop - Cinema

0814 Hop Badge photo 0814_BlogHop_badge_zps151630b6.jpg

Hi there friend!  Welcome to the Cinema blog hop! This month we're using Club Scrap's Cinema collection.  I'm going to show you how I created an interactive and cute gift card holder.

If you traveled here from Lisa's blog, then you are following the hop!  If you've lost your way or just want to see all the links in one place, head over to the Club Scrap Creates blog to see a list of all the talented bloggers participating today.

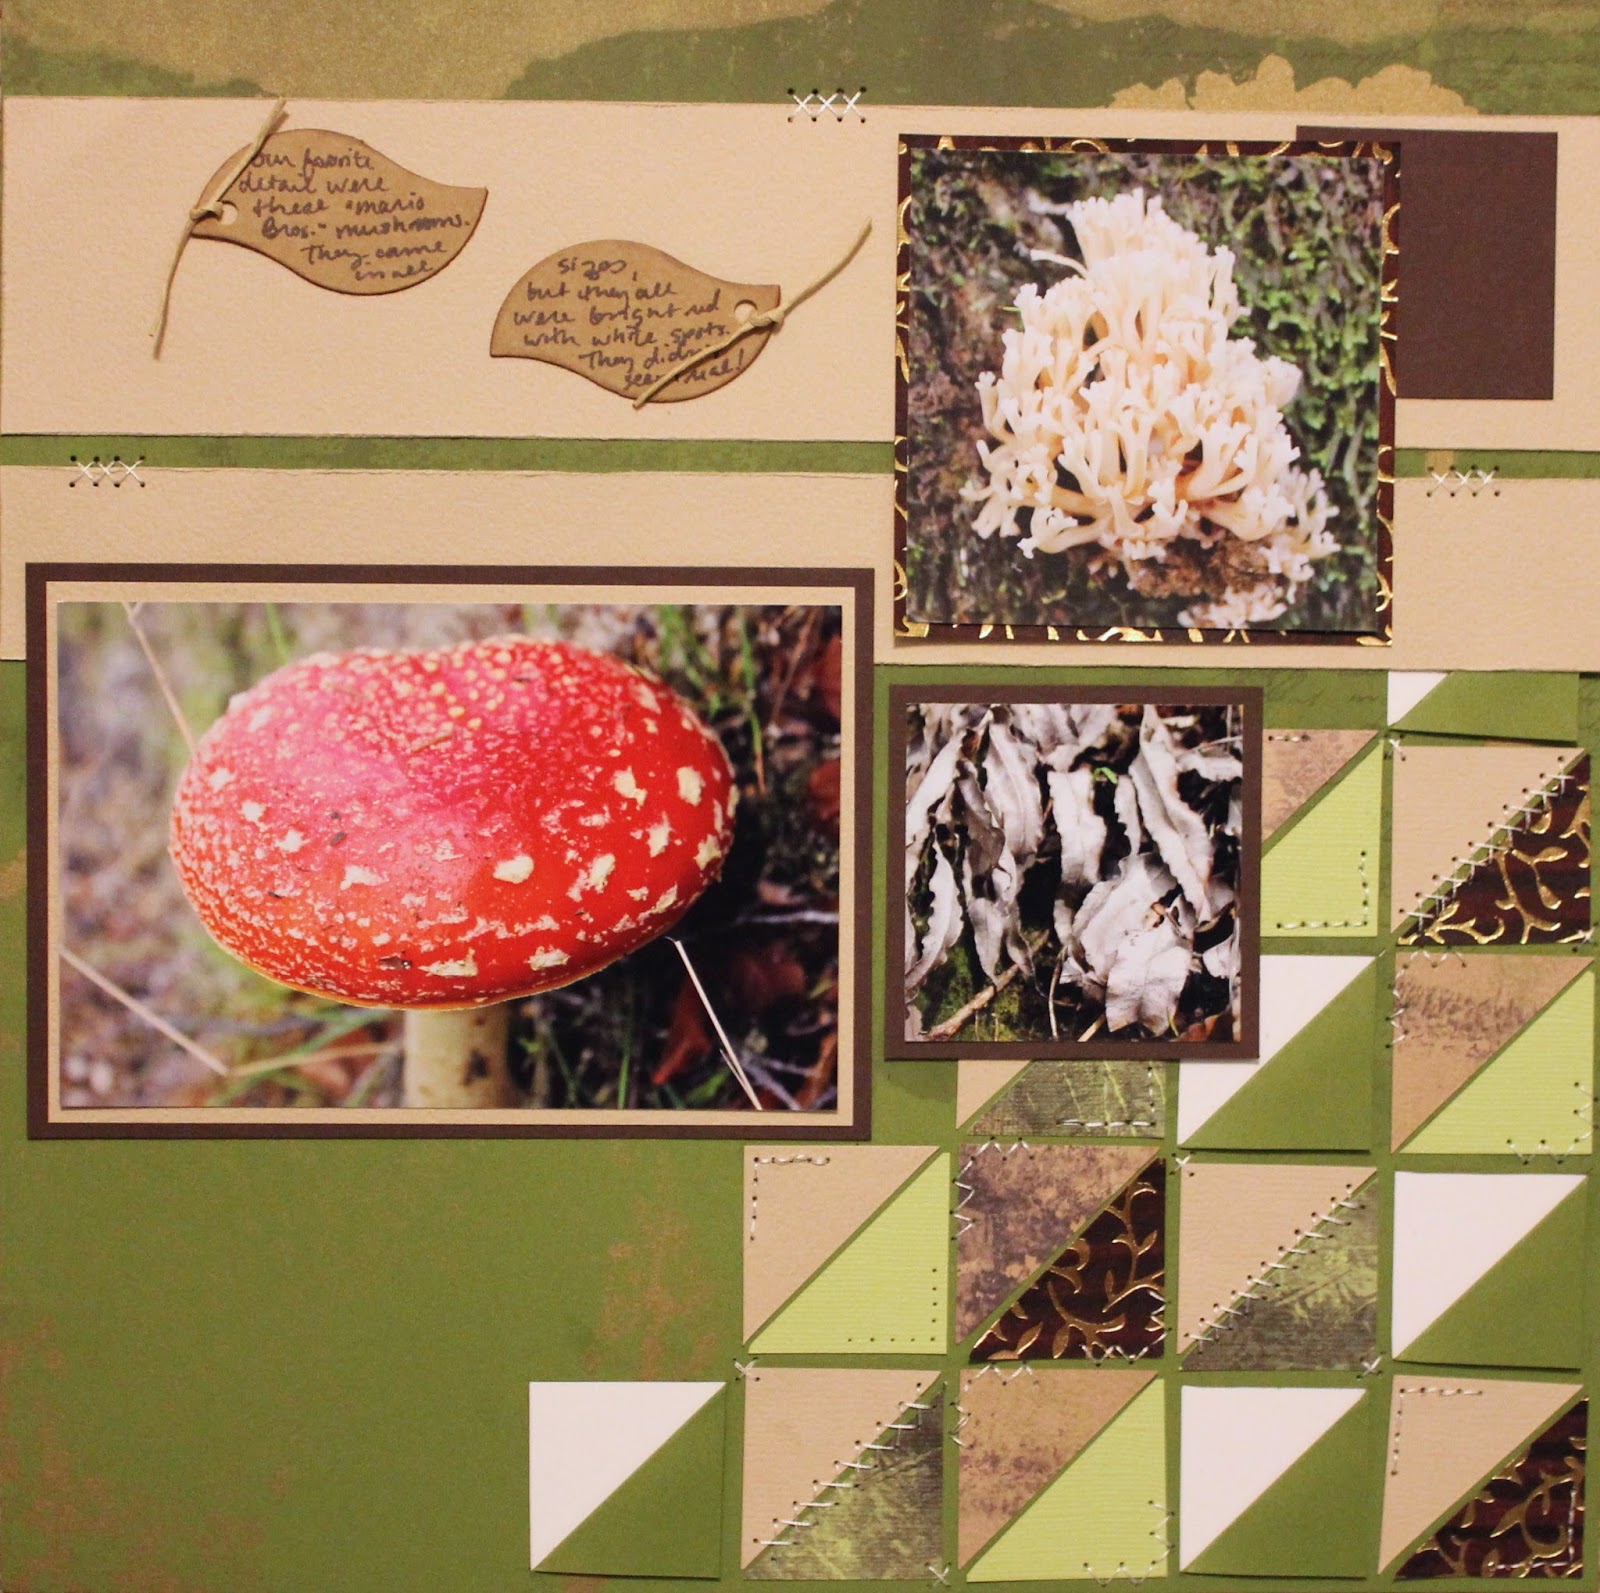
I had already decided what I wanted to make before creating a mood board for this month's kit, but I went ahead and lurked around Pinterest anyways and found some good ideas for future Cinema layouts, cards, and projects:


Follow Marya Kaszubinski's board Cinema Mood Board - Club Scrap August 2014 on Pinterest.

I had a kit to make slider cards lying around in my craft room, so I used those as a template to create this gift card holder:


I'll take you step by step on how to create this fun, interactive card!  Grab a cup of coffee and someone to give you a back rub while you read - it might take a little while ;)  (In a hurry?  Jump over to the next blog on the hop and stop by again later.)

First, here is a diagram showing the basic cuts and folds needed to make this card:


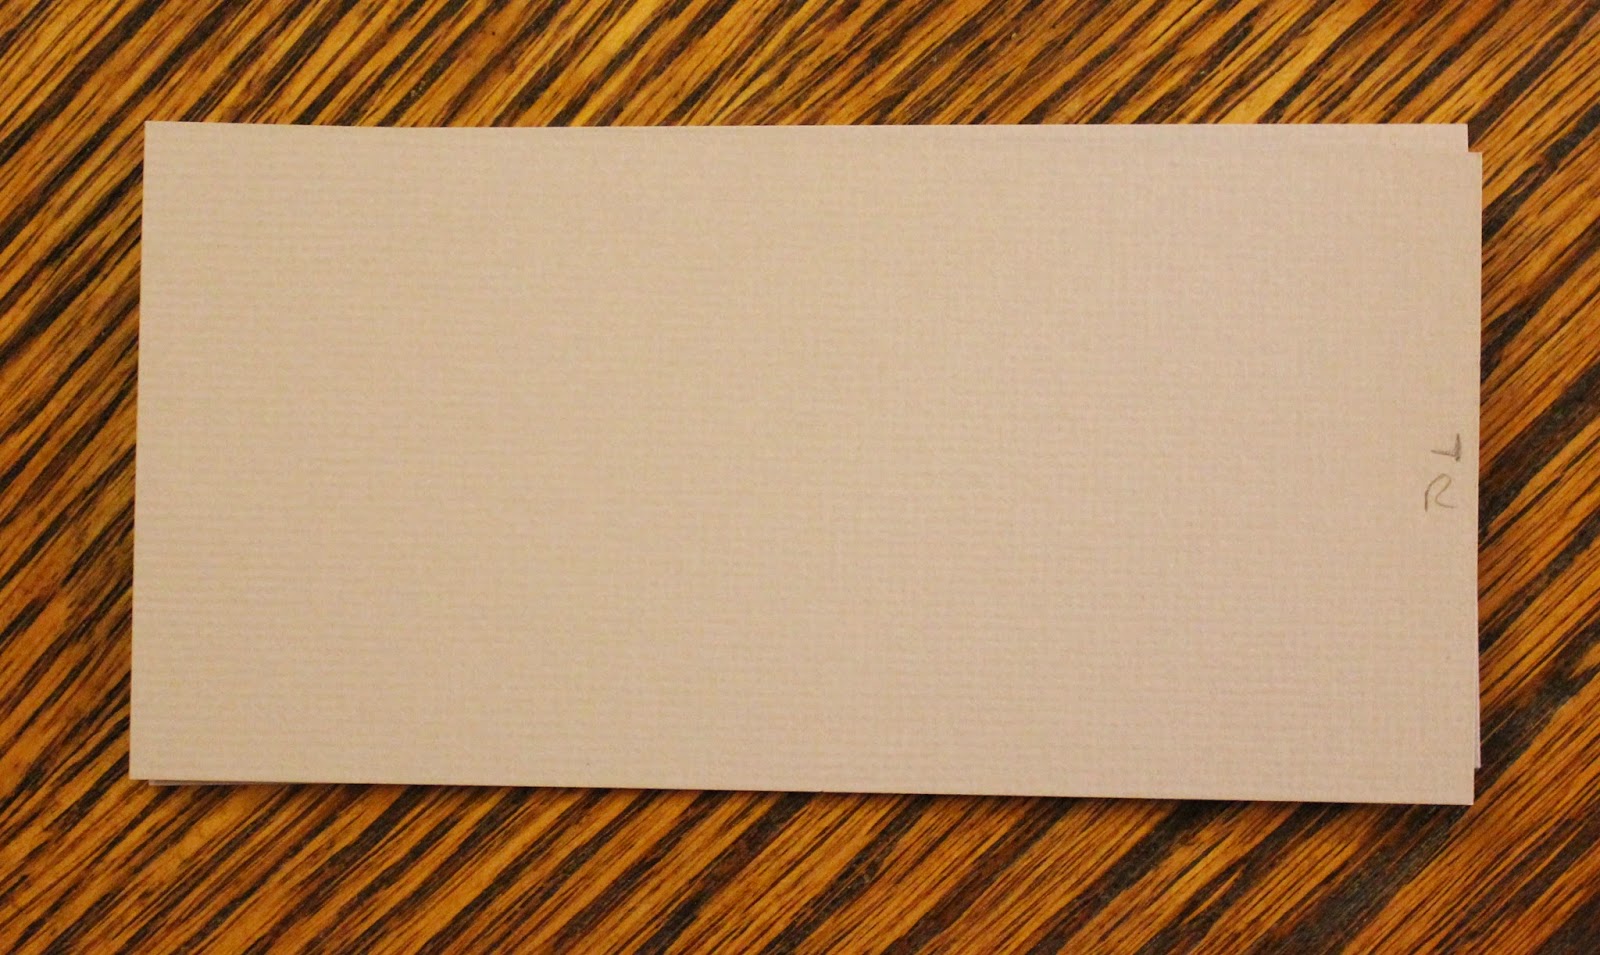
Begin with a 6 inch by 12 inch piece of cardstock.  Place it horizontally on your score board and score at 2 7/8", 3 1/4", 6 1/8", 6 1/2", and 9 3/8".

Once your score marks are in place, you will make a few simple cuts.  On the section after your last score mark (the one placed at 9 3/8"), draw a line 1/2 inch away from the edges down to the score line.  You will first make a diagonal cut from the outside edge of the score line up to the penciled in line, then continue to cut to the end of the paper.  (See diagram for clarification.)  Do this on both short sides of this panel.

You will also make notches along one edge of this piece.  I used the Envelope Punch Board to make my notches, but you could also use a circle punch and create semi-circles for a notch instead.

If you are using the Envelope Punch Board, you will turn your paper horizontally so the cut panel is pointing to the left, and you will line up the left score line at the 1/2 inch mark, then punch.  Do this on all three remaining panels.  (You do not need to punch a notch on the cut panel.)

Now, for the slightly tricky part - making the sliding component of the card.  You will need a piece of flexible plastic - I cut a piece of the plastic bag that the Club Scrap paper comes in, but I've seen these types of cards using strips cut from plastic grocery bags as well.  Use what you have on hand!

You will need to cut a 1 1/2 by 11 1/2 inch strip of plastic and you will fold this in half and adhere into a loop that is now 1 1/2 by 5 1/4 inches in length.

Finally, you will need two additional panels of cardstock cut to 5 5/8 by 2 3/4 inches - these will be the panels that slide in and out of the card.

Here are all of the components of the card laid out:


Prior to constructing the card, you may want to decorate your sliding panels.  I used the stencil from this kit to create a background on the left panel, and added some photo corners to hold the movie gift card I'm keeping in this card.  I also stamped a "Happy Birthday" sentiment from Club Scrap's Tribal collection on the right panel, decorated it with the Cinema washi tape, and added some of the ribbon to help with pulling the panel out.

Once decorated, place the left panel facing up in front of you.  Place a strip of adhesive about 1/8 inch away from the right edge of the panel and attach the right edge of the plastic loop to the adhesive.  The plastic will be laying flat on the panel, only attached on the right side.  I've pulled the plastic to the side in the picture below to show where it is attached to the panel, but this plastic will lie flat on the panel and should not go over the edges of the panel.


Once you have put the plastic loop in the correct place, put a bit of adhesive on the top left edge of the adhesive, and line up the second slider panel directly above the first with the decorated side facing up.  Sandwich the plastic in between these two panels so it is connected to the bottom on the right and the top on the left.  


Here is a diagram of what this would look like from the side:


Next, insert the cut panel of the main body of the card into the plastic loop - when you cut the edges of this panel down by half an inch on each side, this created a "tab" that should slide right inside the plastic loop.  When this is inserted, your card will look like this (note that the decorated panels are face down when constructed):


Roll the top of the card down towards you along the score lines to make a box.  Place adhesive on the bottom long edge of the box/card to finish it off.

I stamped a sentiment on the top of the card, but you could nestle layers of paper here or other embellishments.  (Or pick up the wonderful Cinema stamps that would go perfectly with the theme of the card!)  Pull on the tab on the right of the card and both panels will slide out of the card!


Now you have a fun, interactive card to give to friends and family!

Thank you all for stopping by and reading through all of these instructions!  I hope you have a chance to try this card out for yourself.

Now head on over to Annette Dragon's to see what she has to show you this month.  Come back next month when we're making big projects with the Blueprints collection!

August 3, 2014

31 Days of Cards - Day 3


This card is a more colorful variation on yesterday's card.  I used the same stamp and my collection of neon inks to create the main panel.  This was a fun card to make and I used it in another challenge at Club Scrap - Pam's NBUS challenge.  This is such a good challenge to make you dig through your stash and actually use it!  I have a few never-before-used-stuff in my stash that I hope to tackle this year...

August 2, 2014

31 Days of Cards - Day 2


Day 2!  Another simple card, but I really like how this turned out.  I got to play around with my Stampamajig and my Copics, so I'm happy!  Simple and clean.  This card is also based on the sketch for this month's challenge over at Club Scrap. Go check out the sketch and join in on the fun!

August 1, 2014

31 Days of Cards - Day 1


I have been ignoring the crafting/blogging world for far too long this summer, so I challenged myself to make a card for every day in August.  I find that cards are an easy and quick way to get a technique, stamp, or supplies used, and they usually help me jump-start my creativity.

My first card is pretty simple - I stamped the same citrus slice several times in neon yellow and orange ink and outlined the yellow slices with a marker.  It's hard to tell from the picture here, but I covered the orange image in Glossy Accents for some interest.  I stamped the sentiment in black ink and hand-wrote "you are" above it. 

I'm not in love with this card, but it's a start!  One down, thirty to go.  Check back daily for a new card!

July 30, 2014

Club Scrap Blog Hop - Oopsie Daisy

 photo 0714_BlogHopBadge_zps11dfbe72.jpg

Hello again!  Welcome to the Oopsie Daisy blog hop! This month we're using Club Scrap's Oopsie Daisy collection.  I'm going to show you how I created a project based on something I found I needed while traveling for work earlier this month!

If you traveled here from Tiare's blog, then you are following the hop!  If you've lost your way or just want to see all the links in one place, head over to the Club Scrap Creates blog to see a list of all the talented bloggers participating today.

I have totally been neglecting the crafting world and my scrapbook room over the past 6 weeks due to work (I didn't even have time to create my monthly mood board yet!  Gasp!  You know it's bad when I'm ignoring Pinterest...).  I'm so glad I'm slowly getting back into the swing of things and had time to churn out this quick little project using this month's kit!

I was in Madrid presenting at three meetings earlier this month (I know, my life is so hard) and I found myself having an unorganized time trying to juggle all of my maps, tickets, and receipts.   (I just threw them all in a plastic bag.)  That made it pretty difficult weeks later when I was trying to complete my expense report at work.  (My sandwich for lunch?  Definitely reimbursable.  The cute dress I bought?  Not so much...)  I decided I wanted to recreate a project from Club Scrap to help me stay organized on my next business trip.


So I created this travel portfolio using the warm and deliciously textured papers from this month's kit.  This portfolio is a recreation of the Retreat packet we received for the Retreat in 2012.  Just grab a few business-sized envelopes, your favorite Club Scrap papers, a few stamps, and off you go!


First adhere the flaps of the envelopes to the outside (the smooth side) of the next envelope, as I did above, so you have a line of envelopes connected to each other.  I then covered the non-pocket sides of the envelopes with paper and stamps.  I didn't take my normal leisurely stroll around GHM before my Lite kit shipped, but I'm kicking myself for not picking up some of those adorable stamps to decorate this portfolio with.  I made do with a globe (from Bookshelves) and "noise" stamp (from Comfort Zone) to decorate the front of my portfolio.


On the non-pocket side of the portfolio, I added in a little business card holder following Tricia's instructions here, with a few adjustments to make it thinner so the portfolio would close.  That means I can throw this into by bag, keep my mementos and receipts organized, and be all professional-like and whip out my card like no one's business.


On the pocket side, I added in spaces for labels, but I couldn't decide how to label these envelopes quite yet.  I may change this out and create a mini pocket so I can slip different labels out depending on how I'm going to organize this portfolio.  Right now I have room for business expense receipts, personal receipts, tickets, and maps!

Thank you all for stopping by and bearing with me through this bout of radio silence!  I hope next month is a little more calm - I'm only traveling in the States this time ;)  Which leaves more time to create and scrap!

Now head on over to Annette Dragon's to see what she has to show you this month.  Come back next month when we're getting ready for our close ups with the Cinema collection!

May 28, 2014

Club Scrap Blog Hop - Dungarees

Dungarees Blog Hop photo Dungarees_blog_hop_badge_zpsa159cd0d.jpg

Greetings!  Welcome to the Dungarees blog hop! This month we're using Club Scrap's Dungarees collection.  I'm going to show you how I tried to fit in some quick scrapping in between all of my travels this month!

If you traveled here from Tiare's blog, then you are following the hop!  If you've lost your way or just want to see all the links in one place, head over to the Club Scrap Creates blog to see a list of all the talented bloggers participating today.

At the beginning of the month, I knew I would have lots of photos by the end and I knew I needed a quick an easy way to scrap these photos.  I was lucky enough to "have" to go to London for work, and then I spent a week in Poland visiting a friend.  Those two weeks of travel didn't leave a lot of time for scrapbooking, keeping up with blog reading, or other scrappy things (like visiting my favorite message board - I'll make a reappearance soon my CS friends!)  I did manage to start a mood board, but I plan to add many more pins to this even after this blog hop:

Follow Marya Kaszubinski's board Dungarees Mood Board - Club Scrap May 2014 on Pinterest.

So I decided to start using some of my stash and made the commitment that I was going to use a Sn@p album and the pocketed pages included to document my previous work trip to London and Scotland, and my current travels to the UK and Poland.  A week after returning to the States, I have most of my pictures printed and a few pages put together thanks to my Dungarees kit, so I'm counting that as a win!


The colors of this kit really worked well with my travel pictures.  The bright blues complimented the blue skies (if they appeared in London) and the yummy orange really made the pages pop. Plus the amazing texture of these papers can't be missed!  You can especially see these textures when you rip the papers as I did on this photo mat, and they add some nice dimension to the little banner I created out of waxed linen thread and the safety pins from this collection.


I had some fun coming up with different ways to use the elements of this kit.  I matted all photos on the cardstock from the kit so they would not slide around too much in the pockets.  I ended up cutting the papers into 1/2 inch strips, then adhering them on a diagonal to another piece of paper to make the fun paper element seen below.


The beauty of pocketed page protectors is that you can fit a lot of photos in a small space.  By using papers from the same collection, I'm able to create a cohesive mini album, even though I will be using pictures from three different events.


There were a lot of cute embellishments from this month's kit that I added to my cart, especially these garments tags that I've used for a journalling spot.  I've let the string from this tag hang out over the top of the page protector, just for some interest.  I tend to think of "mini-albums" as a little less formal than my "official" 12x12 albums, so I'm looking forward to adding some interactive pieces to these pages.


And in my delusional grand plan, I was going to have all pictures from London, Scotland, and Poland scrapped within a week returning to home, and guess how that went?  I think I will be able to get these done fairly quickly, and will be back soon with a full album share.  (I hope!)

Thank you so much for stopping by!  Now head on over to Annette Dragon's to see what she has to show you this month.  Come back next month when we're officially welcoming summer with Club Scrap's Picnic collection!

April 30, 2014

Club Scrap Blog Hop - Hydrangeas

 photo hydrangeas_hop_badge_rsz_zps8964cf2c.jpg

Hi there!  Welcome to the Hydrangeas blog hop! This month we're using Club Scrap's Hydrangeas collection.  I'm going to show you how I was inspired to use all things watercolor in my cards this month.

If you traveled here from Lisa's blog, then you are following the hop!  If you've lost your way or just want to see all the links in one place, head over to the Club Scrap Creates blog to see a list of all the talented bloggers participating today.

As now is my monthly routine, on the first of the month I created a mood board based on the theme and colors of the kit, and was really loving all of the beautiful examples of watercolors out there:

Follow Marya Kaszubinski's board Hydrangeas Mood Board - Club Scrap April Kit on Pinterest.

I knew I wanted to try to use one element of watercolors in each of my cards and while I had plenty of materials to work with, I focused on making four cards for upcoming events - Mother's Day and birthdays.  I used papers, embellishments and stamps from the Club Scrap kit and the instructions Tricia provided for the Assembly Line Card Making for February's kit, Big Deal.

I first tried out all of my watercolors on a test swatch to see what I was working with.  I'm now storing this is my handy-dandy notebook that we made at Retreat in 2013:


Then I got off to work assembling cards and using my traditional watercolors, my watercolor crayons, and my watercolor pencils.  So many mediums to choose from!


For my first card, I stamped the chevron from the Art Nouveau stamp set multiple times across watercolor paper.  I then colored in the spaces using watercolor crayons and a paint brush.  Instead of coloring directly on the paper, I rubbed the crayon on a non-stick surface and used a wet brush to pick up the paint from there.  I also made a mottled background with the same colors by painting with the watercolor crayon, then going back over with clean water.


I also cut out the "Happy Birthday" sentiment on my electronic die cutter machine in the same font that matches this month's kit.  I love how happy this card turned out!


For my second card, I used the print with the embossed flowers and colored these in with watercolor pencils.  I colored directly onto the paper, then used water and a brush to spread the color around.  To finish the card off, I took a waterbrush and the pencils I used to color the images in and flicked the color from the end of the pencils onto the paper.  I love the little splatters this creates!


For this card, I knew I wanted to color in this wonderful hydrangea image from the Borders and Backgrounds stamp set.  I first tried to stamp the image and then color it in with watercolors, but that covered up the stamped lines too much.  Instead, I took two pieces of watercolor paper and used purple and green to cover the whole piece, and once dried, I stamped over these with India Ink.  I then cut out the image and adhered with flat and dimensional adhesive.


I also used a special technique to get this variegated look to the colors.  Once you have put down your watercolor, make sure the paint is still pretty wet.  Then flick or drop alcohol onto the wet paper, and the water will react and move away, leaving some of the color behind.  It's science!  (And pretty cool!)


Finally, for my last card, I created an ombre background using my watercolor crayons and I cut another sentiment out of the same font.  (Did you know that on the first of the month, Club Scrap posts all the details of the kit, including a link to the font used?  Go check some out here!)  I left this sentiment plain, and I really like the stark contrast of the white against the springy ombre.

Thank you so much for stopping by!  I hope you drag out your watercolors (because I know you all have these in your stash.  Maybe even several sets...) and try to add some colorful elements in your cards, layouts, and projects.  And even though today is the last day of April, be sure to post your watercolor creations in Pam's challenge thread over at the Coffeehouse - hope to see you there!

Now head on over to Annette Dragon's to see what she has to share this month.  Come back in May when we're getting comfy with Club Scrap's Dungarees collection!


April 14, 2014

April Goals

So at work, I am totally all about making lists and crossing things off those lists in order to keep myself organized. (You should see my grocery list - it's grouped by sections in the order I hit them in the store.  And my packing lists for trips?  Organized by outfits, toiletries, electronics - yeah, I know I'm crazy.)  I'm really trying to get a handle on what I need to do creatively as well, so I figure a list would help here too!

Luckily, the lovely ladies at the Club Scrap message board help to keep you on track by talking about their monthly goals on the forum.  I figure if I post my goals for April here and over there, maybe I will finish some of them up!

So for April, I'm hoping to:


  1. Meet the goal for the layout challenge at Club Scrap (8 1-page layouts, or 4 2-page layouts, or a combination of both)
  2. Get my project ready for the Hydrangeas blog hop at the end of the month.
  3. Get my cards completed and in the mail for the birthday card swap.
  4. Edit my backlog of photos and figure out which ones need printing.
  5. Brainstorm for May's blog hop (I have an idea brewing already...)
  6. Organize my craft room - I'm starting out with one hour of organization a week, 'cause really?  Not much more than that is actually going to take place.  Keepin' it real, here.
  7. Catch up on the kits I have to ALSB.
  8. Organize all of my fonts, printables, cut files, etc. on my computer.
So I have a start on the first goal, at least.  This past weekend I got a few layouts done - one 2-page layout and one 1-page layout with some Club Scrap kits, and one layout with a Studio Calico kit.  I'm still catching up on my New Zealand photos, but I'm getting towards the end!  Mostly.  Kind of.  We'll see.


Bridge Photoshoot - both pages together

Bridge Photoshoot (Left) - Papers: Club Scrap Hopes, Aspen; Stencil: Club Scrap Solstice; Stamp: Amy Tangerine roller date stamp; Ink: Club Scrap Lagoon; Embellishments: Club Scrap Hopes kit stickers

Bridge Photoshoot (Right) - Club Scrap HopesAspenStencil: Club Scrap Solstice; Ink: Club Scrap LagoonEmbellishments: Club Scrap Hopes kit stickers, Amy Tangerine Remarks Yes Please stickers

Glenorchy Daytrip - Papers: Club Scrap Full Circle Jr; Embellishments: Club Scrap  Full Circle Jr stickers
Day 3 - All materials (other than kraft background) from Studio Calico Blue Note kit.  Oh, except this roller date stamp and the wood veneer stars.

So hopefully I will be back later this month to say I accomplished all of my goals!  Fingers crossed...

March 30, 2014

Assembly Line Boot Camp - Week 7: Sparkles

Boot Camp Badge photo BootcampBadge_zpscde08388.jpg

Welcome back! I'm joining in for Week Seven of Club Scrap's Assembly Line Boot Camp challenge.  If you're not sure what this this, go check out the information page if you are interested, but basically this is a weekly challenge, based on a prompt, that encourages you to get going on your layouts, cards, and projects.  Plus, not only are you eligible for prizes, but each submission earns Operation Write Home a donation, so it's for a good cause, too.

This week's theme is Sparkles, and I only got a couple of pages done.  I did a ton last week, and it was a little hard to keep that momentum going when work and errands got in the way.  But there is always next week!


March 26, 2014

Club Scrap Blog Hop - Trees

Trees Blog Hop Badge_rev photo Trees_Hop_Badge_zps35358256.jpg

Hello!  Welcome to the Trees blog hop! This month we're using Club Scrap's Trees collection.  I'm going to show you how I used the beautiful paper in the kit to create some handmade details for my scrapbook layout.

If you traveled here from Lisa's blog, then you are following the hop!  If you've lost your way or just want to see all the links in one place, head over to the Club Scrap Creates blog to see a list of all the talented bloggers participating today.

As usual, on the first of the month I got all excited and created a mood board based on the theme of the kit and the warm and springy colors in the palette:


Follow Marya Kaszubinski's board Trees Mood Board - Club Scrap March 2014 on Pinterest.

Check out my other mood boards here and here.

This month I was particularly drawn to the beautiful greens in the kit and in my mood board, and I also found a lot of inspiration from quilts and geometric shapes on Pinterest.


I was lucky enough to take some time off of work last week and go scrapping at my friend Marie's house for four days, so I tackled a lot of scrapping projects that were in the works.  I was able to complete the bulk of my New Zealand album...which has since turned into albums.  I knew the lush greens and browns of this kit would go perfectly with my hiking pictures.  (Even the bright red mushroom goes with these papers - do you see that thing?  Pretty sure that is straight out of Super Mario Bros.)


I used this month's layout card as the basis of the layout, and took advantage of the open white space to "quilt" with some paper.  (Quilting and this kit seem to go hand in hand - check out Kay's card and layout here!)  I cut some of the paper into 1.5 inch squares and then in half again to make triangles.  Then I paired them up to make my own quilted embellishment.


I also did some paper cutting on this page by cutting two sides of a triangle and folding the flap back to create an open space that I later backed with the white paper from the kit.  I adhered the flaps with foam tape so they would retain their dimension - I was really pleased with the combination of the flaps and the flat paper triangles!


Finally, to continue with the quilted theme, I added some hand-stitched details with my trusty paper piercer, needle and thread.  I finished this part up while watching Breaking Bad - I find it so relaxing!  (Not the show.  The show is awesome and addictive and thrilling, but relaxing it is not.)

I hope to get some more paper piecing and "quilting" into my projects since I loved how this page turned out.  Thank you so much for stopping by and I hope you might try some quilting and hand stitching in your projects!  Head on over to Annette Dragon's to see what she has to share.  Come back next month when we're working with the floral Hydrangeas collection!


09 10